Welcome fellow artist! Anamation has now moved to dancinghedgehog.co.uk
Please follow us there to find out more about the character work we do for storytelling and animation!
Welcome fellow artist! Anamation has now moved to dancinghedgehog.co.uk
Please follow us there to find out more about the character work we do for storytelling and animation!
Watch this space!
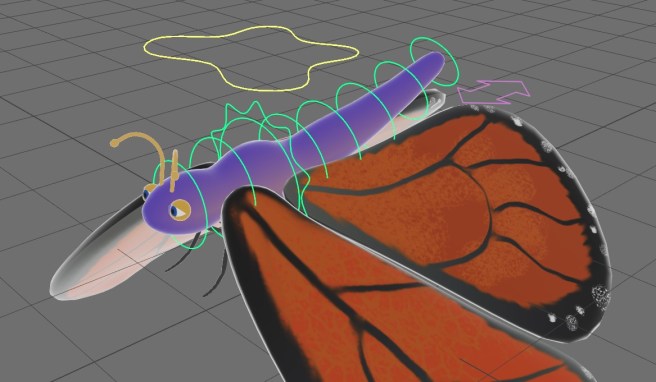
Loading course on rigging and animation scripting with Python in Maya, for our little creature called ButterWings.
First book coming up by April 2026.
Video courses will follow afterwards and will become available by August 2026.
Story
Once upon a time there was a mouse named Gram Glueypaws who lived in the manor house of a rich granny, Beatrice Sparklington. Every day Gram would leave his burrow, from under the mahogany staircase, to steal some shiny jewels granny Beatrice left around the house.
Until one day, Beatrice saw Gram plodding along her Persian carpet with her best string of pearls. Beatrice shrieked and called her servants to find the rodent. Her servants searched and dug inside the house with pickaxes and shovels. They made many holes and made Beatrice furious.
Until finally, they discovered Gram’s treasure trove. He had collected hundreds of jewels and pearls to decorate his home for his wife and newly born baby mouse, Stephen. Beatrice’s heart melted, remembering her past youth and unrequited wish to have children. She forgave Gram and his grubby paws.
Ever since that day, Beatrice and Gram have been the best of friends. Gram decorates Beatrice’s home, which now looks like swiss cheese, and she helps his family with spare food and jewellery.
The moral of the story is: Never judge someone’s actions, because you don’t know the whole truth.
Technical Details
Art Station Link: https://www.artstation.com/artwork/3q1vND
Tools: Autodesk Maya and Arnold, Substance Painter
Gram was modelled in Autodesk Maya, textured in Substance Painter and rendered with Arnold Renderer. The face count for the final model is ~40 000 polygons. The material used for all the meshes in the scene is aiStandardSurface, an Arnold specific material, which allows presets like Skin, for realistic skin effects. In the work in progress image below, purple shades were added in the Subsurface Colour sections of the material, with the Skin Preset activated. For the eyes, a circular colour ramp was used to create the iris and pupil.

Lighting was done with Arnold Area Lights, two on the sides, two for the top and bottom and one behind the character. The left hand side light is the key light with an intensity of 350 and a light blue tint. The right hand side light is a fill light with an intensity of 100. The back light is a rim light with an intensity of 500 and a yellow tint. The top and bottom lights have a lower intensity of 50, to fill in any sharp shadows. Two disk lights were also added for the glint in the eyes. Finally a Skydome light with a gradient colour was used for the background. Light Linking was used to remove the influence of some lights from the stage, as it looked overexposed. The Exposure for all the lights was 1.
Texturing was done in Substance Painter. The main material parameters used were Base Colour, Roughness and Height. The overall look aimed for was of a furless mouse who had rolled in sparkly jewels and precious metals for a long time. Looking at him now, he reminds me of a purple coral, a bit rough around the edges, and rather porous.
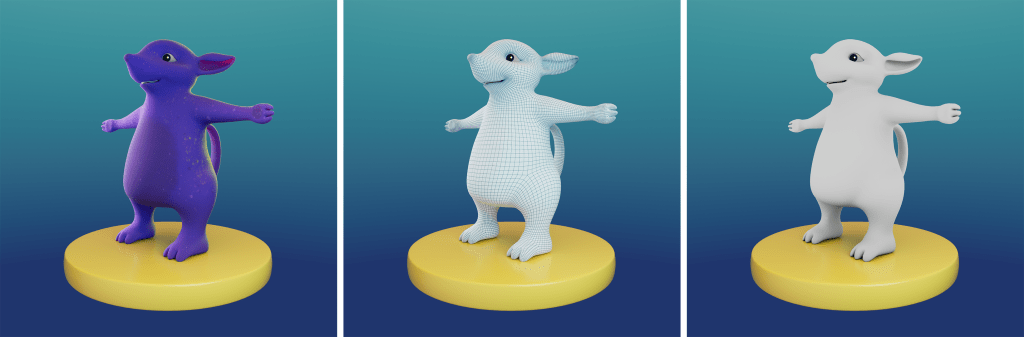
The render was done at a resolution of 2048 x 2048 with camera samples of 5, Diffuse, Specular and SSS of 3 and Transmission of 2. Ray Depth was a 4 for Diffuse and Specular and 8 for Transmission (although I did not make any parts transparent, so this can be reduced). The render passes used were created using the Render Setup window. This allowed Master (Beauty), Wireframe and Ambient Occlusion layers to be created as it can be seen in the final image below. The stage material was kept the same in all the renders, to offer a contrast from the character.

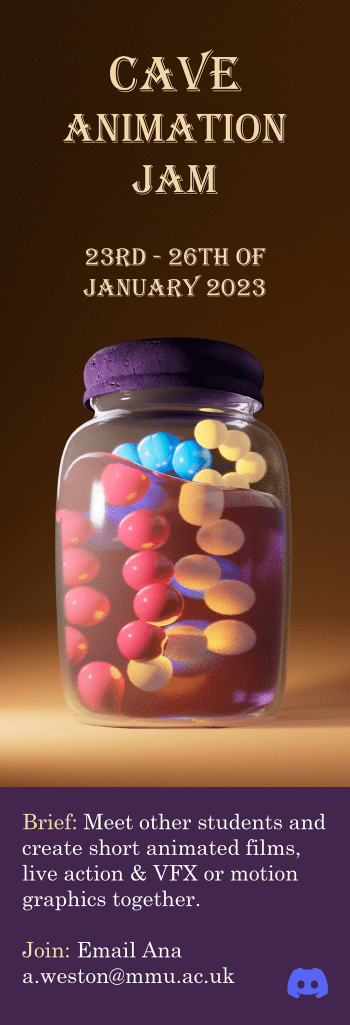
We’re starting preparations for the CAVE (Computer Animation and Visual Effects) Animation Jam, which will take place between the 23rd and 26th of January 2023 at Manchester Metropolitan University. If you wish to see what our students and staff are up to, have a look at our Twitter Page. This page will be updated with more information soon.
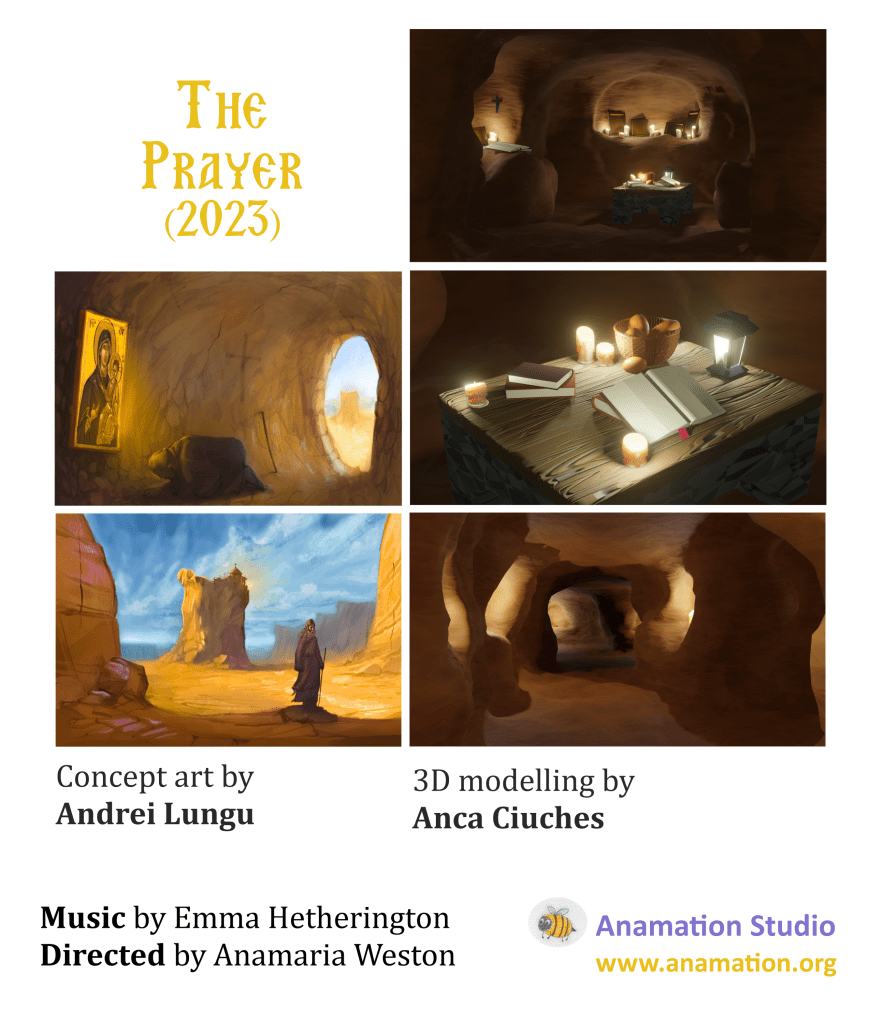
This will be a short 3D animation about the strength monastic prayer has on the lives of people living in the world. The spirit of it will try to be truthful to the Orthodox Christian faith most of Eastern Europe shares. The story follows a prayerful monk as he quietly retreats into his desert cave to pray as the world outside struggles with sin. The monk’s prayers are then shown to alleviate the world’s pain through the help of the Holy Spirit, Who connects all people in God’s love.
The animation will be in 3D and requires a small group of freelance artists to work on it via tasks. These tasks can run for 2-5 days. Each artist can choose one or more tasks to focus on every week.
The artists chosen are either early career professionals or benefactors who wish to contribute to our work. We would like to pay our freelancers for their efforts, hence we made this fundraiser: Go Fund Me for The Prayer
Thank you for any help you can give!
Artists and Websites
Directed by Anamaria Weston, music composer Emma Hetherington, 3D modeller Anca-Luiza Ciuches, concept artist Andrei Lungu, art director Natalia Nikitin, and technical director Helena Josol.
Arlene’s Story
Arlene Claddagh, an Irish archeologist, who’s on a quest to find her Viking ancestors. Her family is under the burden of a curse that makes all the women in the family die young. This is because a long time ago, Arlene’s great great grandmother, Clidhna Claddagh, was forced into marrying a Viking prince to restore peace to their land. She betrayed him, however, by setting fire to the Viking settlement on their wedding night. Before her death, the prince’s mother cast a curse on Clidhna’s wedding ring, that all women from her line should die before they turn thirty.
Many generations later, Arlene, Clidhna’s great great granddaughter, is trying to break the curse. She needs to find the ancestral ring and bring it back to the descendants of the Viking prince. Arlene hopes peace can reign once more between their families. To learn more about the history of her ancestors, she studied archeology at Oxford University until the age of twenty five. Once trapped in her books, Arlene has now awoken to a startling realization. She has five years to break the curse.
Technical Details
Art Station Link: https://www.artstation.com/artwork/3q1vND
Tools: Autodesk Maya and Arnold, Substance Painter, Adobe Photoshop
The hard part is over, you’ve created a masterpiece. Now all you have to do is put your feet up, eat caramels and watch Netflix, right? Wrong! What are you doing? Now is the time for your art/science work to shine! It’s time to share it with the world. ‘But how miss?’ I hear you say in a nasal voice. ‘Can’t I just show a playblast of my clown car bumping into a giant fish balloon?’ No! Would you go to a job interview in your pyjamas? Unless you’re interviewing for sleepwalking (that would be a cool profession), you would go in your ‘I look good in this’ clothes. It’s time to do the same for your creations, they deserve it!
Here are some tips for character turntables in Maya, along with useful links for methods to make your creations stand out. These techniques can be applied to machines, spaceships, fruit bowls, hamsters, anything you can think of really. If you wish to take your practice forward have a look at A Shot From Start to Finish created for Houdini. Most of the principles discussed in the video apply to Maya as well. But before you get all expert on me, let’s start with the basics.
Turntables are a popular way to showcase your character from all angles. They usually involve a 360 degree rotation of the character or of the camera around the character. A few elements to consider when creating that fancy turntable for your portfolio are described below. Images from the short film Hugsy Showing Off, as well as referenced artists’ work will be used to illustrate these concepts. Also have a look at the Useful Links suggested, as they offer more in depth tutorials and examples of the techniques mentioned.
Useful Links: Quickly Create a Turntable
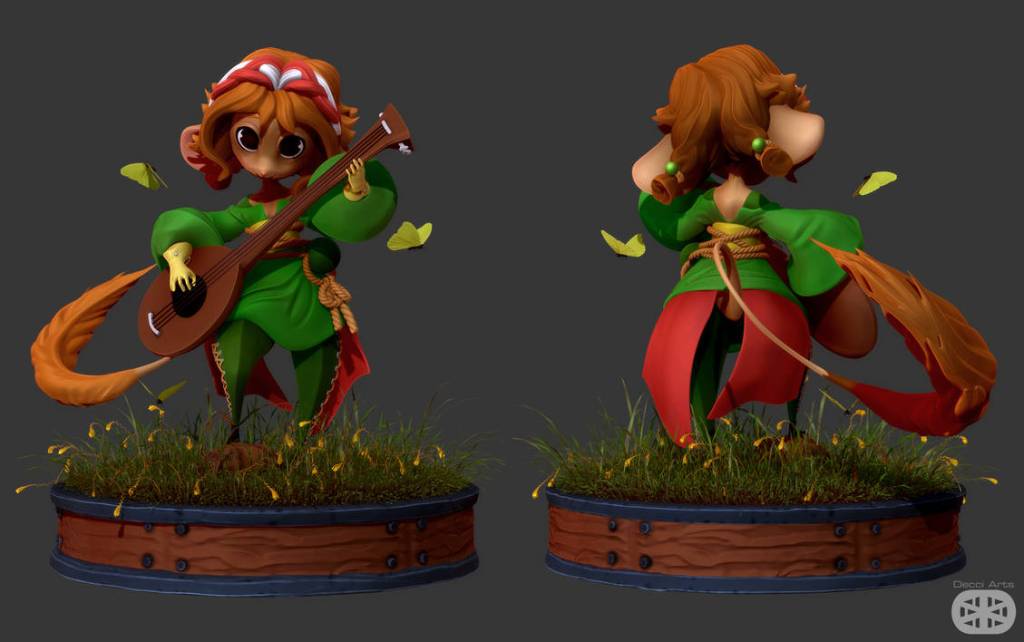
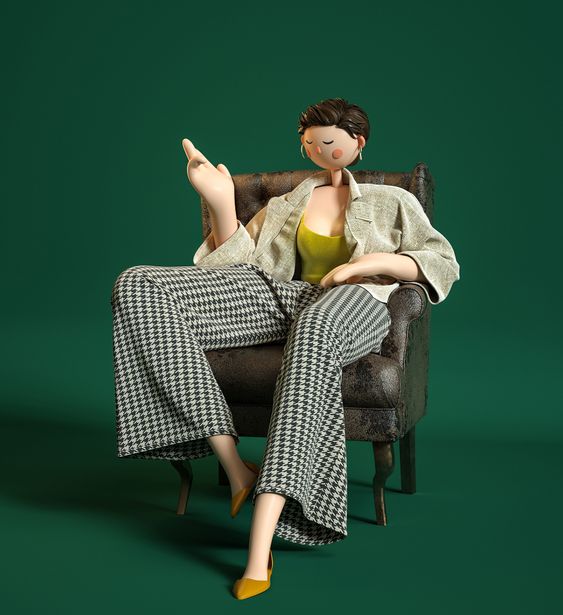
Unless your character is a floating genie or a cormorant, they should be sitting or standing on a surface to better illustrate contact shadows. This can be a simple cylinder, a stage or can be a support modelled specifically for your character (eg. squishy armchair with support for XXL slushies). This way, the character becomes grounded and connected to our gravitation driven understanding.
Useful Links: Character Turntable by Pablo ZCh

If you have time, include one or two props to give some insight into your character’s background. If they’re a doctor, add a stethoscope, if they’re a koala skydiver, why not add a parachute? This helps add personality and makes characters more relatable. If you’re really dedicated, why not model a whole environment around your character? Just make sure they can still be visible from all angles, however. We don’t want giant carrots to steal the spotlight from Bugs Bunny.
After weeks of drenching 3D modelling sweats, you probably have a T-Pose or an A-Pose character. You can create a turntable of this initial mesh to show you know proper rigging posing. However, posing your character in a shape that illustrates who they are is vastly more intriguing to the little grey cells (ie. your brain). Having Indiana Jones cracking his whip at a giant boulder would make a way more interesting showcase than just having him in a standard A-Pose.
‘But how do I do that, miss?’ you ask scratching your ear. ‘I don’t have a way to pose Zorg the robot explorer.’
Fear not! There is a quick way, or should I say, a Quick Rig way to pose your characters! This may prove slightly more difficult for models that have more than two legs, in which case you’d have to create a custom skeleton. Quick Rig allows you to create an instant character rig, composed from a skeleton and controllers, to roughly pose your model. If you’d like to add some fingers, you can explore Human IK (IK = Inverse Kinematics), which requires joint creation in Maya .
Useful Links: Quick Rig for Beginners | Rigging a Cat | Upgrading a Quick Rig with Fingers using Human IK
If your fingers have mastered pressing “S” in Maya, then you are initiated in the wonders of keyframe animation. To make your turntable stand out even more, why not add some animation to your character? This can be done by keyframing a few character key poses (eg. victory arms up, I won the Golden Globe pose). Just make sure the animation is cyclical, meaning the start and end frames are the same. This is to ensure a seamless loop for the turntable rotation. The animation shouldn’t distract from the model’s design and topology, but rather should enhance them. For example, if your character is a super stretchy bat, having a static turntable and then showing the wings stretching out could be a great way to illustrate the functionality of the mesh. This step requires some prior rigging, so is best done after a few static character renders first.
Useful Links: 3D Character Turntable and Idle Animation
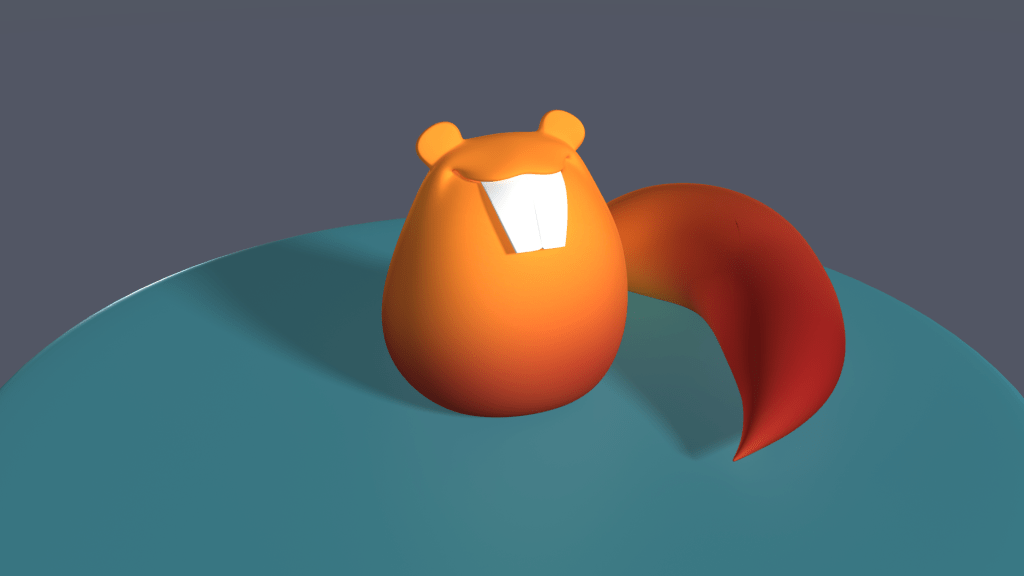
Lighting is great for creating atmosphere and emotion in a scene. It should always enhance the textures chosen for a mesh, which is why white lights are the best starting point. This is because they don’t interfere with the original colours of the texture. Once this techniques is mastered (ie. Thor level of awesomeness), light Temperature (measured in Kelvin, over 6500K is cool, under 6500K is warm) and Color can be experimented with for different effects. Psychedelic lights can make one think of a science fiction scene, sharp shadows or harsh lights might create a horror look.
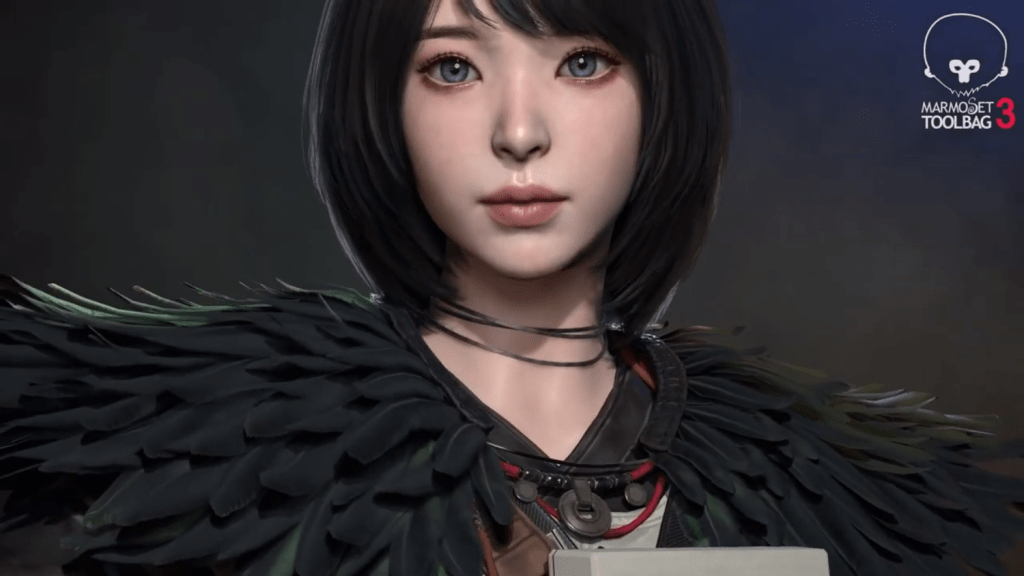
Regardless of the lights in your scene, it is always recommended to have a background colour that makes subtle features stand out. If your model is a fierce viking with girly red hair, don’t make the background red, unless your back lights allow your character to stand out. Otherwise you might lose some curly details. Black backgrounds can be problematic as the edges of the rendered character can fade down the hole inside your screen. White is straining on the eyes, so also not the best option if you have a choice. Gradients, greys and pastels are some good options for backgrounds. These can be set on the light (Skydome Light has a Color attribute), camera (look for Environment > Background Color) or can be created as shaded geometry in the scene. And now, let’s actually put some lights in the scene!
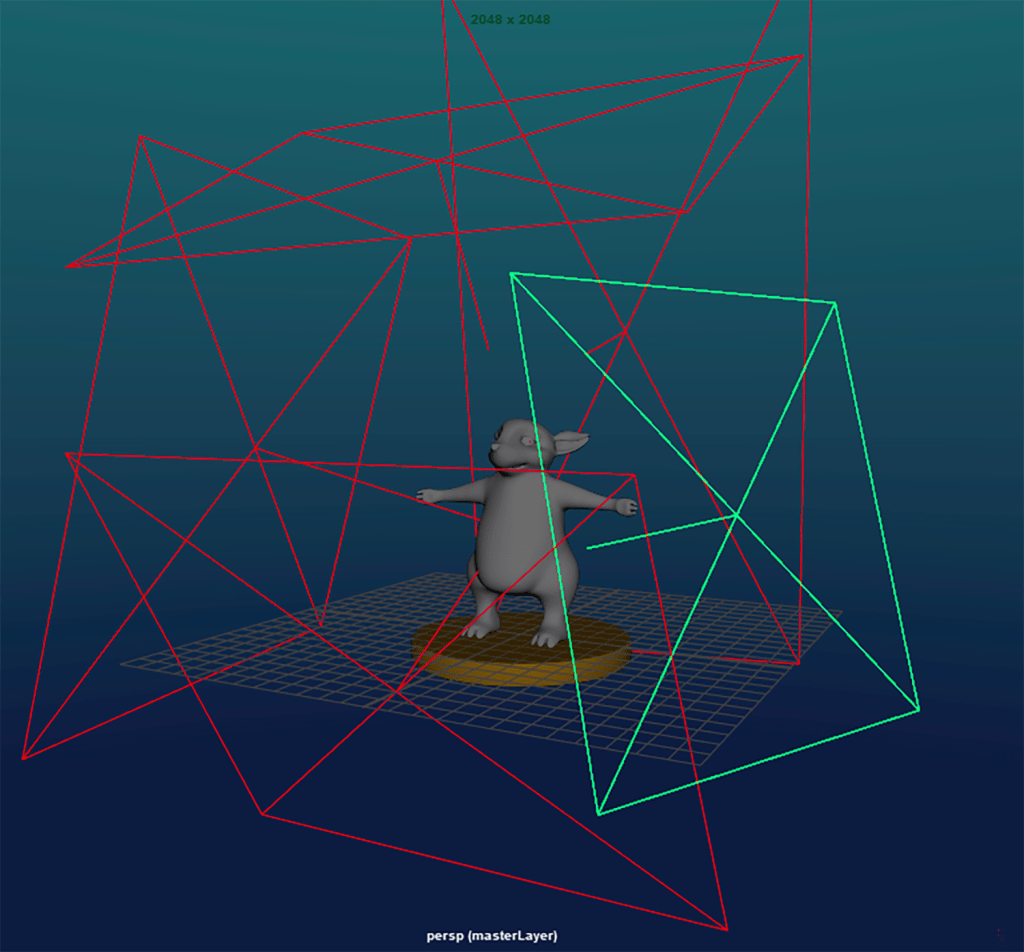
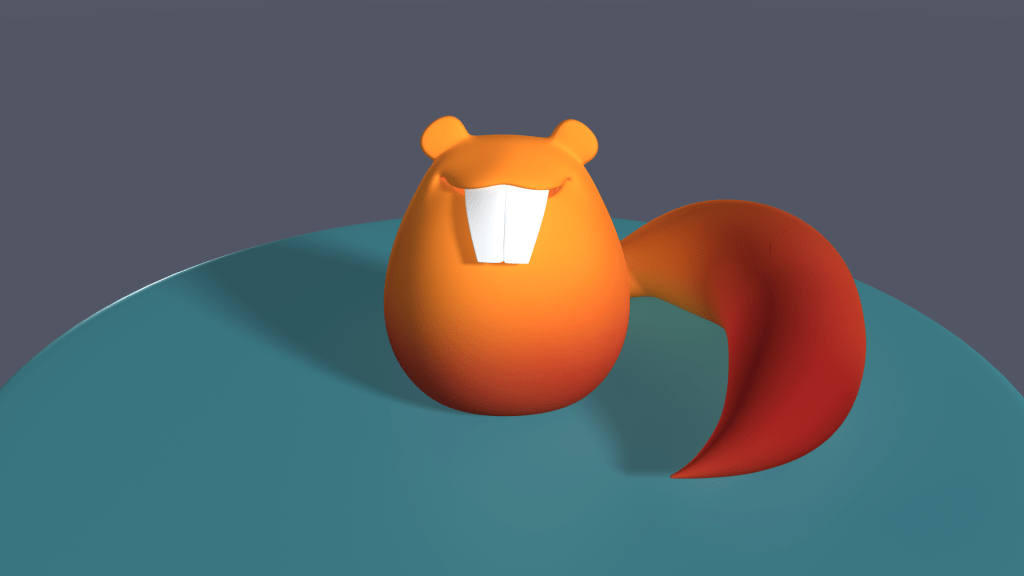
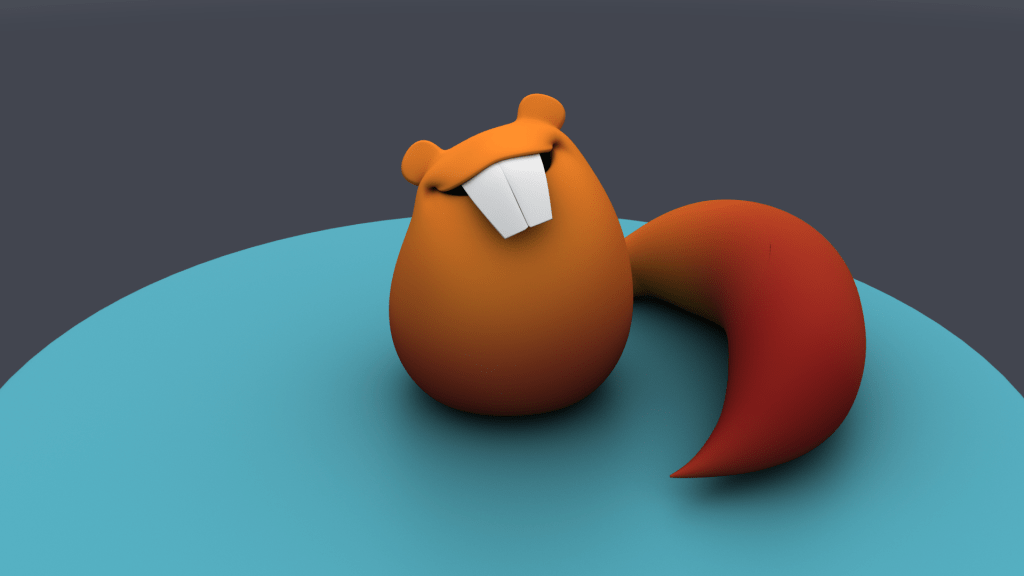
Three Point Lighting is a classic technique from photography and cinematography! It consists of having three main light sources in the scene, a Key, Fill and Back Light. In Maya, these can be standard Maya lights (eg. Spot Light, Directional Light, which was used for Hugsy) or Arnold Lights (eg. Ai Area Light ). The Key Light is the main light source, usually has a higher Intensity (0.8 for Hugsy) and is placed diagonally on one side of the character. The Fill Light is on the mirrored side from the Key Light, has lower Intensity (0.7 for Hugsy) and ensures the character’s features are visible, and not in the abyss of darkness (unless that is your intention). The Back Light, also known as the Rim Light, is used to give a bright contour to the character, so that it stands out from the background. The Intensity (3 for Hugsy) for this light is usually higher than the Key Light, for a clearer definition of the silhouette.
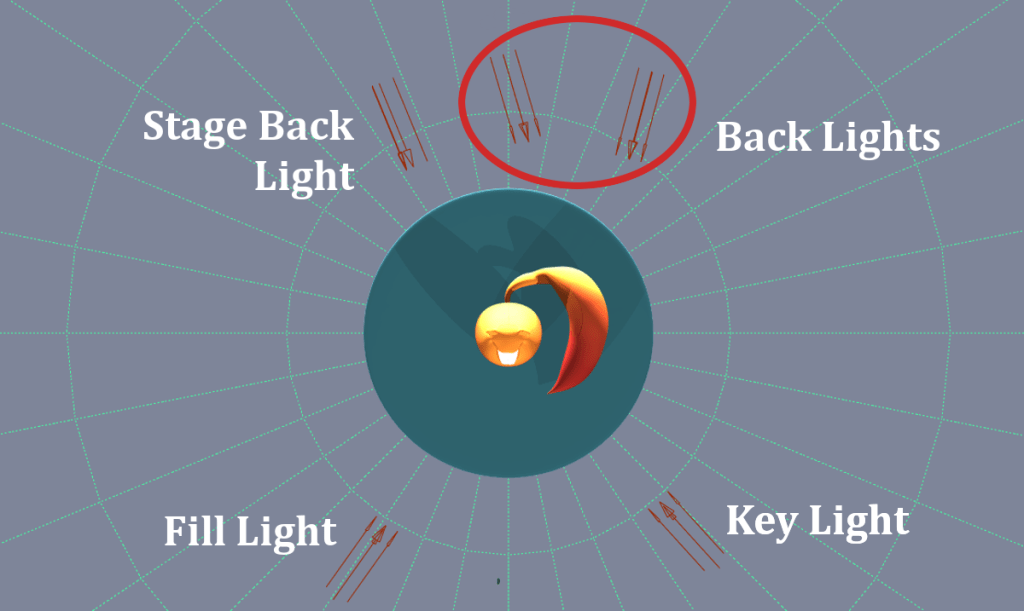
As you can see from the image above, I can’t count to three. Ha! That is because any combination and derivation of Three Point Lighting can be done to achieve the desired look. I decided to use two Back Lights for the body and tail of the squirrel (looks more like a potato bag with teeth and a tail, still cute though). A third Back Light was added just to give a small rim to the stage. Controlling which lights affect which objects can be done from Windows > Relationship Editors > Light Linking. Also, notice in the image below that only the Key Light (on the left of Hugsy) casts a shadow. This was done by ticking Cast Shadows (under the Arnold tab of the Attribute Editor) for the Key Light and leaving the option unticked for the rest of the lights.
Useful Links: Lighting Your 3D Character in Maya | 3 Point Lighting with Arnold | Lighting in Arnold for Maya
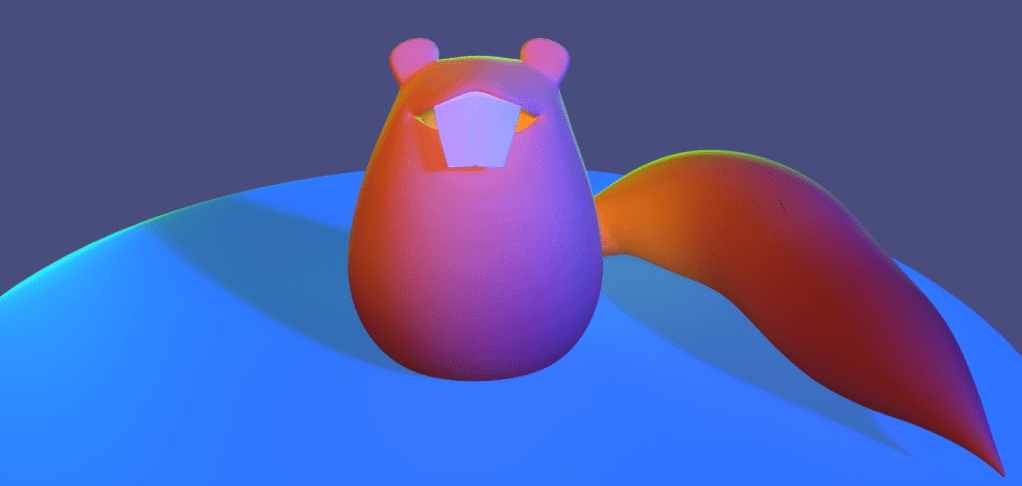
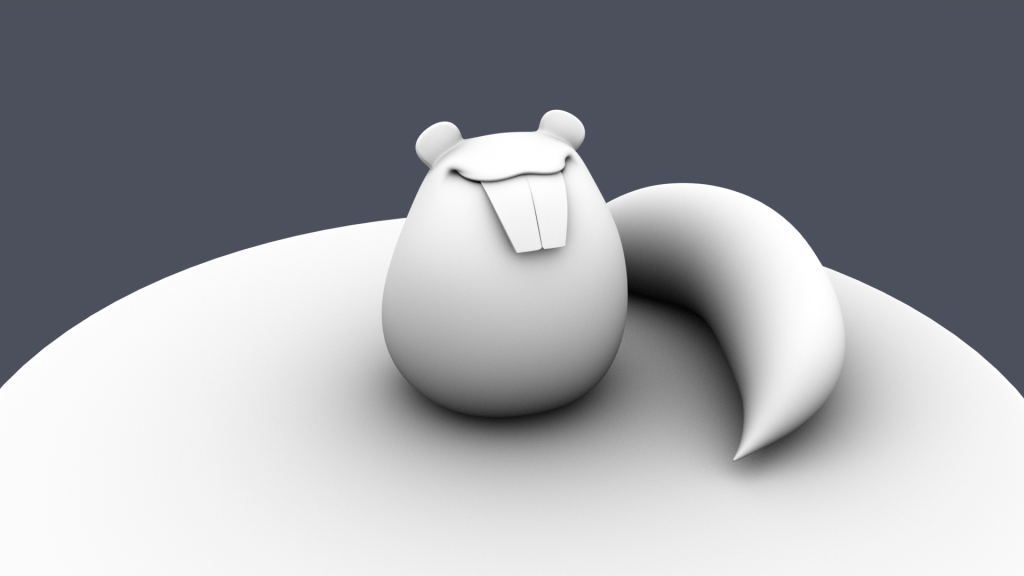
The Skydome Light comes with the Arnold renderer in Maya and consists of a sphere offering uniform lighting in the scene. This light can be seen at the beginning of the Hugsy film. Notice the grey background colour which can be set from the light’s Color attribute in the Attribute Editor. When this type of lighting is used, colours are uniform and shadows are soft. It’s a good light to have in the scene when doing test renders of the textured mesh. It also makes me think of toothpaste ads for some reason. It’s probably because Hugsy’s teeth are so white!
What rotated first, the camera or the character? Well, both are an option, it mostly depends on the lighting in your scene. If lights are uniform from all angles, like when using a Skydome Light, you can rotate the stage, which in turn rotates the character. This can be done through a simple parenting relation between the character and stage (select character, Shift select stage, press P). If the character has a rig attached to it, then parenting can be done through a Parent Constraint between the stage and character’s master controller (select stage, Shift select the master controller, go to Constrain > Parent in the Rigging menu set). I will refrain from saying the obvious ‘Yeshhh mashter’ line that hunchback Igor says to his master, though a pair of crooked teeth. Ooops, I just did.
The standard camera framing for a turntable is a longshot of the character. If your character has some intriguing details (eg. scaly skin, freckled nose etc.), or you wish to show off the wireframe, close ups can be used. For the standard turntable, if the camera is the one rotating, Maya offers a simple tool just for that. In the Animation menu set, you can simply go to Visualize > Create Turntable with the stage or character selected. Then you can specify the number of frames to time the camera’s motion.
Useful Links: May & Myrrh Turntables with Close Ups
Shading refers to creating materials (aka shaders) and textures for your models. The material illustrates the physical properties of the surface (Uuuu, it’s so shiny, can I touch it?), while textures are the colours of that surface. When showing off your spiky characters, dystopian machines, household robots or potato peelers it’s good practice to have shaders that show the model in its full splendour, but also the inner workings of the modelling process. This can be achieved with Ambient Occlusion (AO) shading, which shows the contact shadows of the model, or Wireframe shading that reveals topology. These shaders can then be added to render passes as will be discussed in point (5).
Hugsy is a free character rig from Animation Mentor, originally known as Squirrels. The materials used on it are standard Maya shaders, Lambert for the body and Blinn for the shiny teeth. These materials imitate physics when rendered, but are not physically accurate. If you wish to make use of the Arnold renderer, which allows physically accurate materials and renders, you can use aiStandardSurface shader instead. The colour attributes can then be changed in a similar manner to the standard Maya materials.
Ambient Occlusion (AO) is an Arnold shader that allows the visibility of contact shadows for a model. It is often rendered out and composited together with the Albedo (aka Diffuse without shadows) layer. This allows the separation of light and shadow from a shot, for extra control over the colours of a model. In Maya you can use the Arnold shader aiAmbientOcclusion to create this effect. To get good results, the Samples attribute from the AO shader needs to be at a reasonable rate (5 for Hugsy).
Useful Links: Ambient Occlusion Pass Using Arnold | Ambient Occlusion Autodesk User Guide
Surely after all that time spent modelling quads you want to show off the character’s topology! You didn’t pull your hair out using the Mesh Cleanup tool (still not sure how it actually works) for nothing. There is a simple way to do this in Maya, using the Arnold aiWireframe shader. You can choose between various face types like Triangle, Polygon and Patch to render out, as well as the Line Size and Color.
Useful Links: Wireframe in Arnold | Wireframe Arnold User Guide

After all the shaders have been experimented with, it’s time to put it all together using Render Layers. These are custom Render Passes, which allow you to select which items are rendered in a scene and with what shaders. The sequence is as follows: open the Render Setup window, create a Layer, then a Collection underneath, add the meshes you want included in the collection, then create a Shader Override. In the Shader Override tab, you’ll be able to select which shader you wish to apply for the items in your collection (eg. aiAmbientOcclusion). To render one of the layers, you need to click on the little eye to make sure it’s active. Then in the Rendering menu set, go to Render > Render Sequence. This is assuming you set up the Frame Range, Image Format (eg. TIF, EXR, JPG), Renderable Camera and Image Size (eg. HD 1080p), Arnold Renderer Sampling from the Render Settings window.
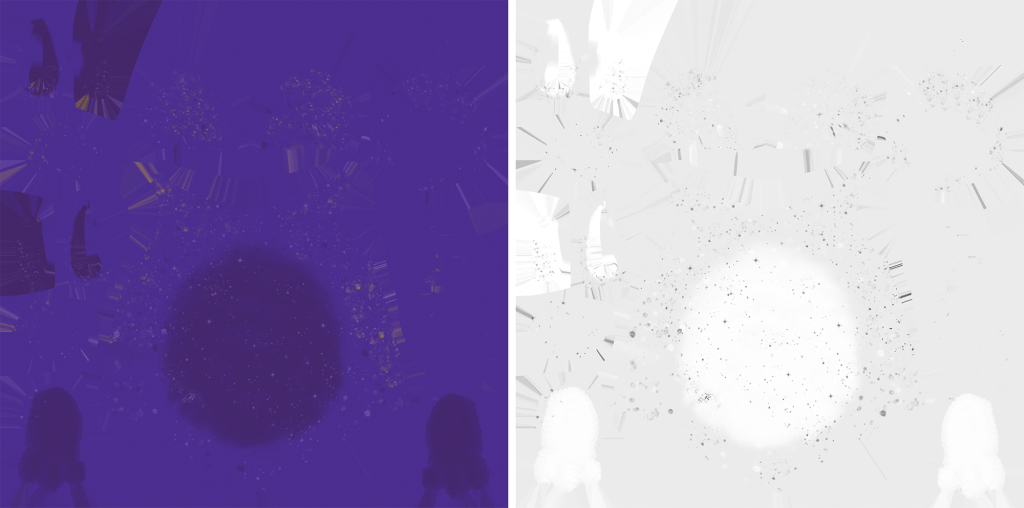
Arbitrary Output Variables (AOV) are similar to Render Passes, with the difference that they focus on rendering more specific shader properties, like the Diffuse, Specular, Subsurface Scattering channels etc. AOVs can be selected in the AOVs tab from the Render Settings window. These passes are then brought together in a compositing software like NUKE or Photoshop. The advantage is that each layer can be modified separately and colours can be changed easily. When rendering all of the passes merged together, it’s known as the Beauty Pass (You’re beautiful darling and so is Yerkov, your explorer meerkat who makes maps for Russian spies) .
Useful Links: Render Setup Basics | Render Setup Overrides | Render Setup Example | AOVS & Render Passes in Maya

Now it’s time to come back to your characters and give them the recognition they deserve with a beautiful turntable. Go render those frames!
*This post was written by Anamaria Ciucanu, for students on the BSc Computer Animation and VFX course at Manchester Metropolitan University. Everyone visiting this site is welcome to enjoy the tips however!
Link: Read full post on Anamaria’s site
This project started as a question: What is it that makes ducks funny? Moreover, I wanted to know if there was a code behind the movement of a funny duck. Rather than attempting to understand everything at once, I chose a simple behaviour, walking, and investigated its “funny” potential. Since emotions are also seen among laughing people, they were chosen as nuances for the walking behaviour.
Procedural animation was used on a duck rig prototype to create a palette of stylized walk cycles. People were then asked to name the emotions they thought each duck walk expressed and also if they found them funny. This work is part of the Character Essences project, which focuses on recreating believable actions using procedural animation.
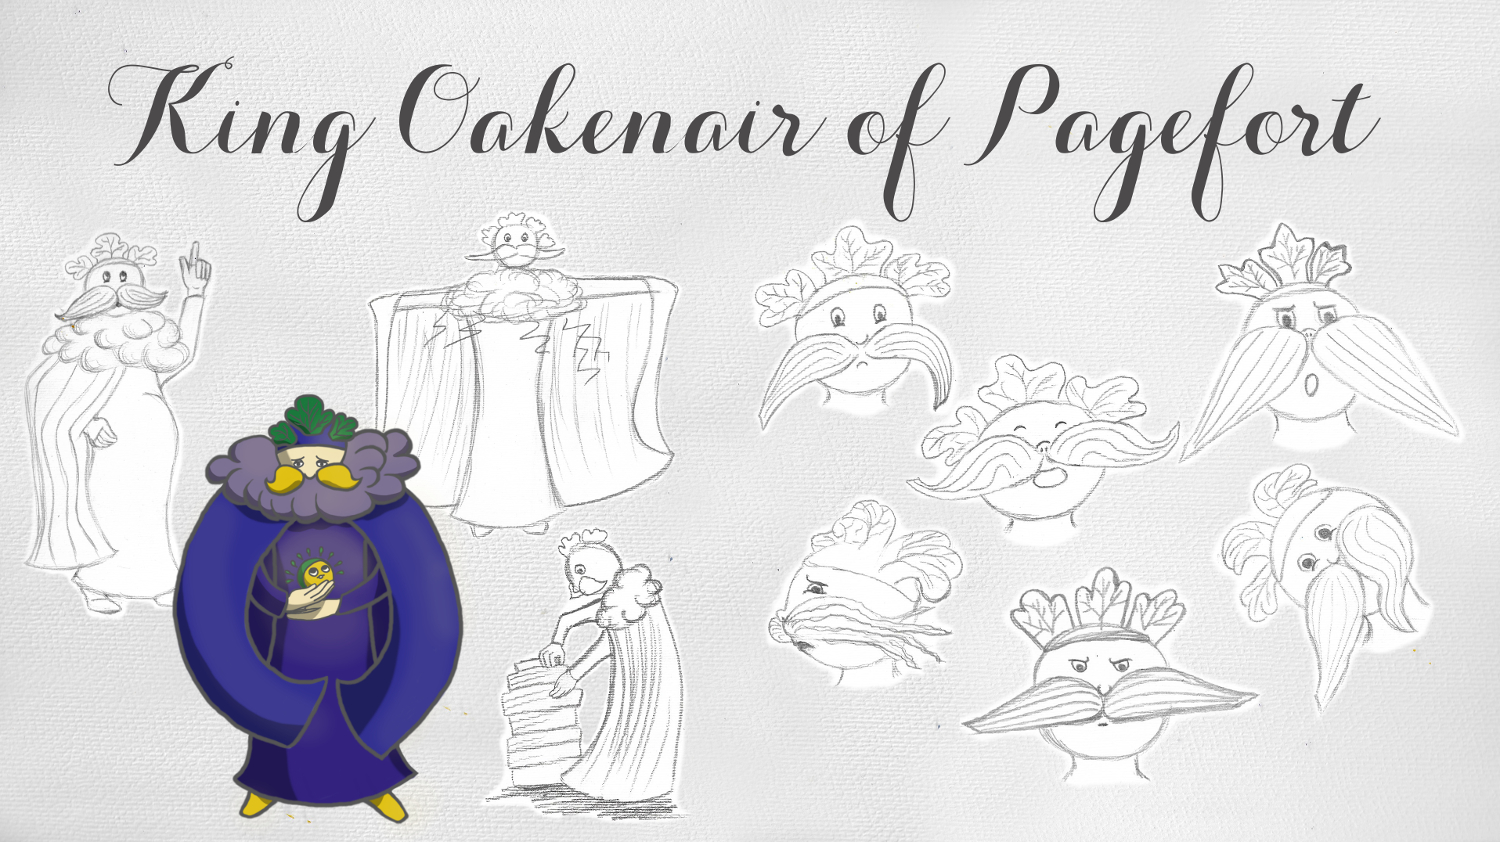
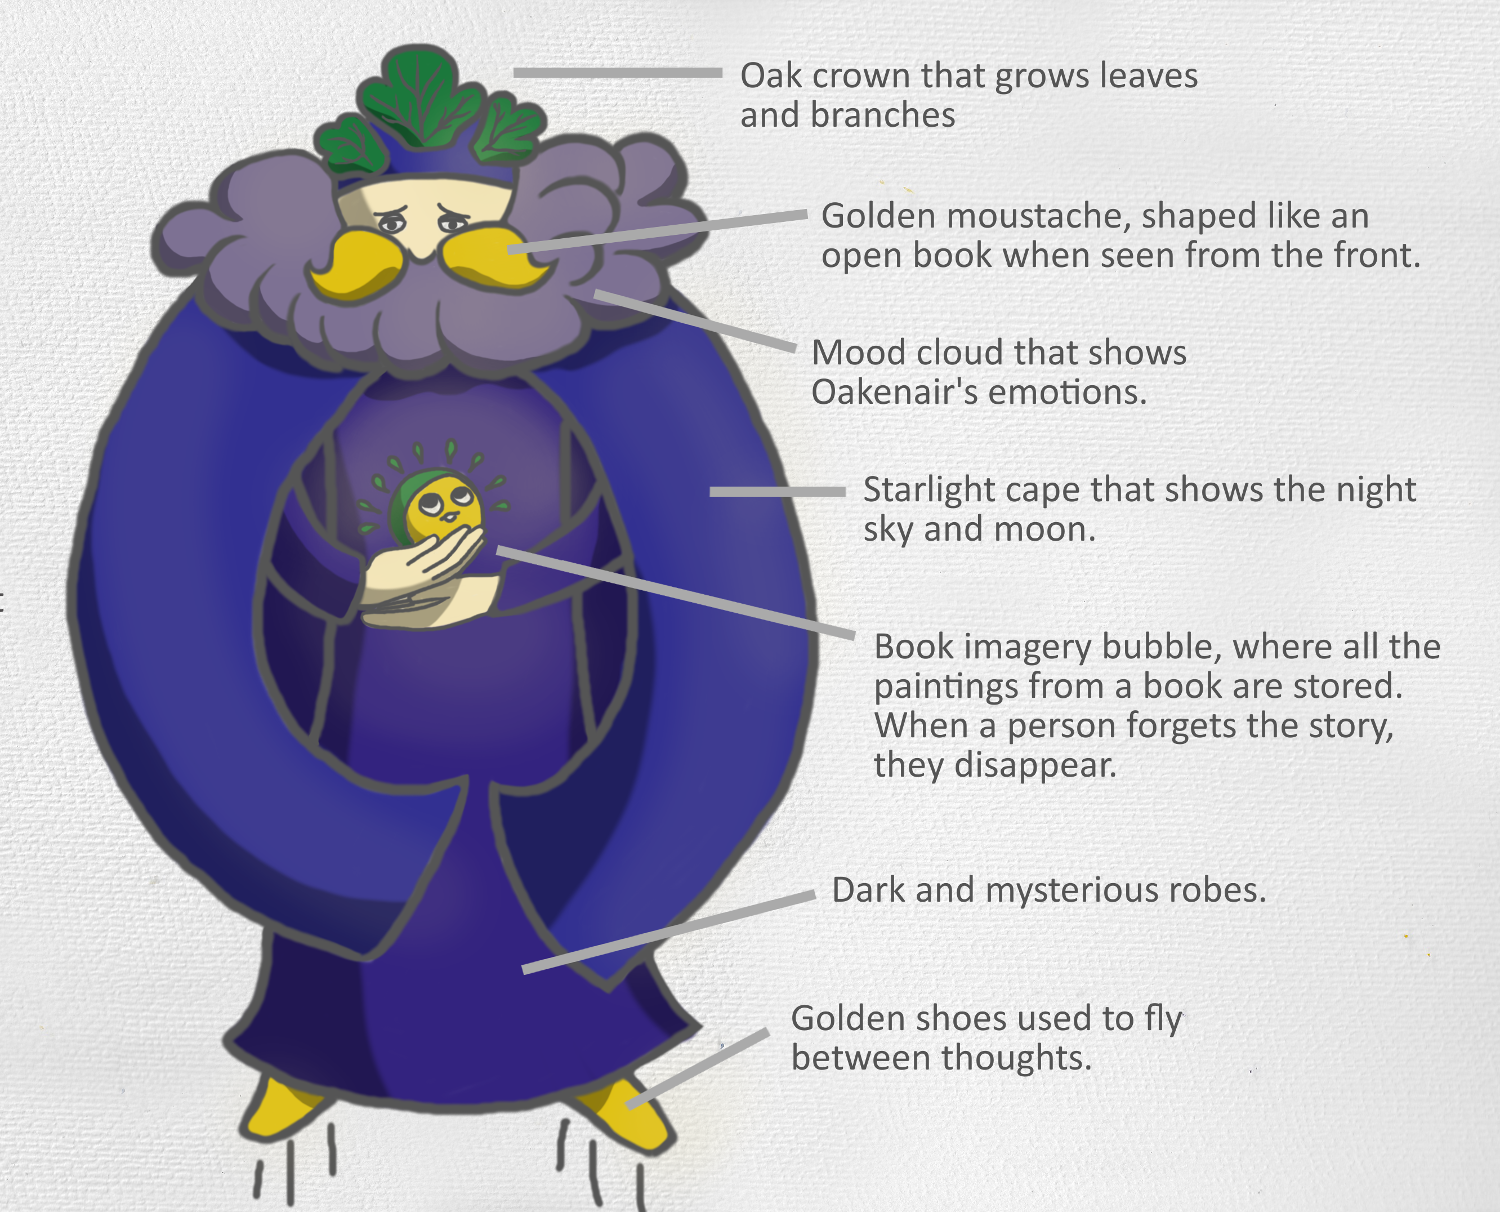
King Oakenair of Pagefort is the maker of worlds in humans’ imagination, when they read books. He paints the mountains and clouds, the trees and lakes from descriptions. The cloud on top of his cape shows his mood and can thunder and cast lighting when he is angry. His cape can show the stars in a moonlit sky.
Oakenair is most joyous when children read as that is when he creates his best work. He is sad when his imagery bubbles disappear, as children draw away from books. These bubbles hold the descriptions painted and the emotions felt while reading the story.

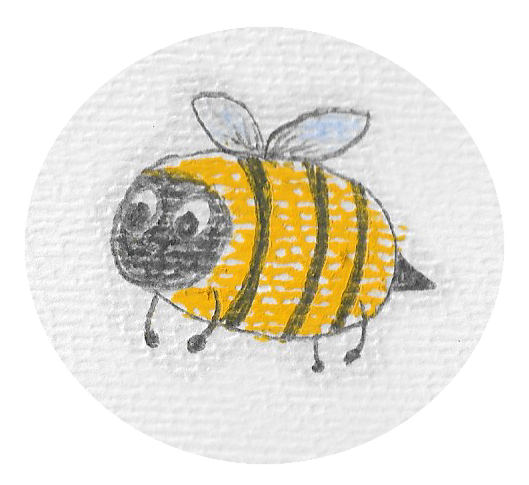
What inspires you when you design your own characters and stories? Sometimes I like to think of a few things I love and start from there. A bumblebee queen in a grand crinoline is floating on the sea, in her oak leaf boat. She is on a quest to find the Book of Wisdom, to learn how to become human. Little does she know that Grey Rabbit has stolen the book and hidden it in ol’ man Barrel’s cherry orchard. It’s a start…